UITableView の基本
リスト表示など、表組み表示では UITableView というビューがよく使われます。
例えば Master-Detail のアプリケーションテンプレートでも、 Master (リスト) として UITableView が使われています。
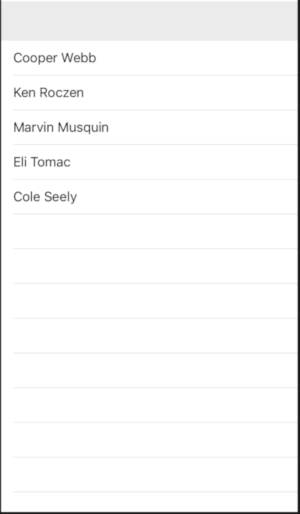
ここではリスト表示の基本として、まず次のように名前のリストを表示してみましょう。
UITableViewController もあるけれど
UITableView を制御するためのビューコントローラクラスとして、UITableViewController というクラスが UIKit に用意されています。
基本的には UITableViewController を UITableView の制御に使うと簡単な場合もあります。しかし、表組みは他のビューと組み合わせて使うことも多いので、 UITableView の制御に特化したビューコントローラを使うことより、他のビューコントローラに同等の機能を持たせることで UITableView をサポートすることも多いです。
このため、ここでは最初から UITableViewController を使わない方向で話を進めていきます。
データモデル
まずは、データを保持するモデルを作っておきましょう。
ひとつひとつのデータは人を表すものとして、Person クラスのオブジェクトとして、名前を String 型の name プロパティに持つものとしましょう。
Person.swift
import Foundation

class Person : Codable {
    var name : String
    init(_ name:String){
        self.name = name
    }
}
あとでファイルに保存することを考えているので、Codable を付けています。
Person オブジェクトの配列を持つクラスを PersonList とします。
PersonList.swift
import Foundation

class PersonList : Codable {
    var list = [Person]()
}
PersonList への要素の追加などを受け持つ管理用クラスとして PersonStore クラスを用意します。
PersonStore.swift
import Foundation

final class PersonStore {

    static let shared = PersonStore()
    private let personList = PersonList()

    private init(){}

    func count() -> Int {
        return personList.list.count
    }

    func add(_ p:Person) {
        personList.list.append(p)
    }

    func get(index i: Int)->Person {
        return personList.list[i]
    }
}
PersonStore 内のデータは、 AppDelegate.swift 内でハードコードして初期化しています。
import UIKit

@UIApplicationMain
class AppDelegate: UIResponder, UIApplicationDelegate {

    var window: UIWindow?

    func application(_ application: UIApplication, didFinishLaunchingWithOptions launchOptions: [UIApplication.LaunchOptionsKey: Any]?) -> Bool {
        PersonStore.shared.add(Person("Cooper Webb"))
        PersonStore.shared.add(Person("Ken Roczen"))
        PersonStore.shared.add(Person("Marvin Musquin"))
        PersonStore.shared.add(Person("Eli Tomac"))
        PersonStore.shared.add(Person("Cole Seely"))

        return true
    }
}
この後の記事「UITableView の編集モード」では、データを動的に追加や削除するように変更します。
ユーザーインターフェイス
ユーザーインターフェイスは次のようにしました。
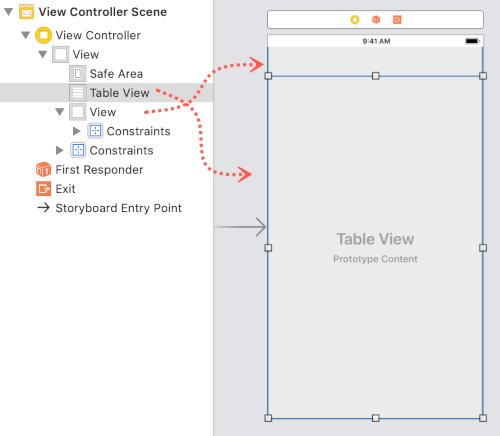
ルートビューは UIView として、そのサブビューとしてヘッダー部分の UIView と、テーブル表示の UITableView を配置します。
画面いっぱいに UITableView を配置しても問題ないのですが、このあとデータの編集のためのボタンを画面上部に配置する予定なので、ヘッダー部分の隙間を確保しておきました。
ビューコントローラ
UITableView を利用する場合には、そのデータソースとなるオブジェクトが UITableViewDataSource プロトコルをコンフォームする必要があります。
通常はビューコントローラをデータソースとします。
そして、テーブルビュー・データソースでは必ず次の二つを行います。
- データの行数を返す。
- それぞれの行(セル)の UITableViewCell を返す。
データの行数は tableView(_:numberOfRowsInSection:) で返します。
セルオブジェクトは tableView(_:cellForRowAt:) で UITableViewCell オブジェクトを返します。
とりあえず、これだけできれば UITableView は表示できます。
import UIKit

class ViewController: UIViewController, UITableViewDataSource {

    let cellIdentifier = "UITableViewCell"

    @IBOutlet weak var tableView: UITableView!

    override func viewDidLoad() {
        super.viewDidLoad()

        tableView.register(
            UITableViewCell.self,
            forCellReuseIdentifier: cellIdentifier)
        tableView.dataSource = self
    }

    func tableView(_ tableView: UITableView, numberOfRowsInSection section: Int) -> Int {
        return PersonStore.shared.count()
    }

    func tableView(_ tableView: UITableView, cellForRowAt indexPath: IndexPath) -> UITableViewCell {
        let cell = tableView.dequeueReusableCell( withIdentifier: cellIdentifier, for: indexPath)
        let p = PersonStore.shared.get(index: indexPath.row)
        cell.textLabel!.text = p.name
        return cell
    }
}
これを実行すると、上でみたようなスクリーンのプログラムが起動するはずです。
尚、tableView(_:cellForRowAt:) で UITableViewCell のオブジェクトを返すことになっていますが、単純に UITableViewCell のインスタンスを作って返すということは通常やりません。(とりあえず、セル数が少なければ動きますけど)
オブジェクトをその都度作るのではなく、メモリを節約するためにオブジェクトを再利用する仕組みがありますので、 それを利用します。そのために、まずセルの ID (通常クラス名) を viewDidLoad で一度登録します。 すると、UITableView の dequeueReusableCell から再利用されたセルオブジェクトがとれるようになります。
    let cellIdentifier = "UITableViewCell"
    ...
    override func viewDidLoad() {
        tableView.register(
            UITableViewCell.self,
            forCellReuseIdentifier: cellIdentifier)
    ...
    }

    func tableView(_ tableView: UITableView, cellForRowAt indexPath: IndexPath) -> UITableViewCell {
        let cell = tableView.dequeueReusableCell(
          withIdentifier: cellIdentifier,
          for: indexPath)
        ...
        return cell
    }
}
このデータを追加、削除、並べ替えなどをするには、引き続き「UITableView の編集モード」をみてください。
以上、UITableView の基本的な使い方について説明しました。